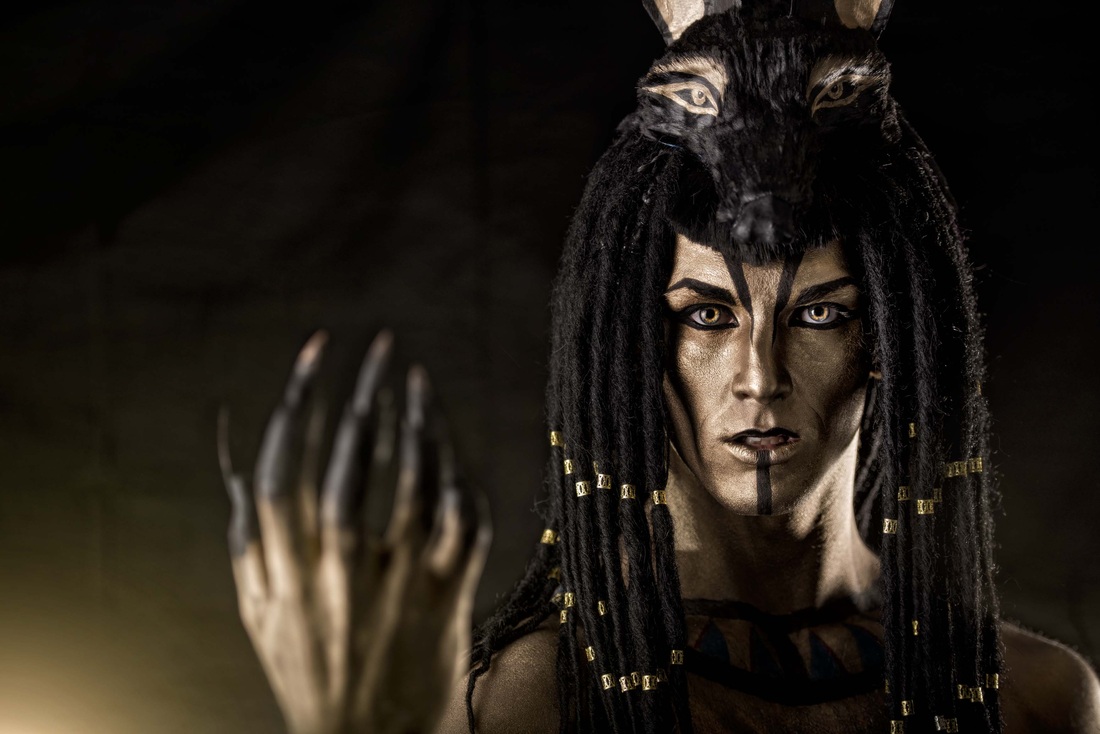
 The image that started it all. The image that started it all.
It's amazing what can spawn an idea, or
the thought of an idea. Sometimes a simple picture, or a piece or art... something you see on the
street, or something someone says to you.
I love it when this happens to me. I'm still learning to finely tune the connections to the creative part of my brain, and learn how to guide them in the right directions to help me pull out great ideas. Sometimes, you just get it right. When I saw this image one day on a blog somewhere, I can't even remember where - Anubis was born in my imagination, and it all spawned like an awesome explosion of ideas from there. It would eventually all come together to make something so awesome, I almost cried when I saw him finished for the first time. In this (lengthy) post, I want to create a documentation of the journey in creating this character, as it was the first of it's kind (hopefully the first of many..). I hope you enjoy the story, and please ask questions if you like. Also - do check out the amazing and awesome Luke Middlebrook, the one and only Anubis, and Travis Longmore, an unbelievably talented photographer, both who I continue to have the pleasure of working with. Creating AnubisCreating the Jackal head
At first I was totally stumped on how to achieve this. I tried wire frame and paper mache, but I couldn't get the malleability I wanted from the metals. My brother suggested we layer aluminium foil and try to mould it on his Doberman's head (lol). Believe it or not, with the assistance of a pooch and a bike seat, it worked. I used hard foam shapes held together with wire to support the shape during the next stage. 
Moulding tools!
Florists wire was a great tool to stick into the foam
shapes and create more sturdy terrain to shape the facial contours.

Foil shape and foam supports.
Once the shape of the Jackal head was complete, the mould
was secured to the board and two layers of 'cloth mache' were added. This was thin strips of cut up
bed sheet, coated in white PVA glue, letting each layer dry completely before applying the next.

Cloth Mache
Once the glue had completely dried, I removed all of the
foil possible from the set head shape and trimmed the edges. I didn't trim all the way to the edge
of the design to ensure that I had some material to play with while creating the wig.

Removing the support, and the inside of the frame after
removal.

My
kitties regularly assisted with construction. They sat around and gave moral support on the many
moments that I nearly lost my mind...
There was a great deal of trial and error in constructing every part of this character. It was really rewarding every time something came together the way I wanted it to. I would just sit back and look at it thinking "Thank the fracking Gods for that..".. The ears were constructed with aluminium foil and
carefully moulded into the basic shape I wanted. I then wrapped them with 2" masking tape, being
careful not to let it build up too much in any one place. This took a few attempts to get right,
and perfectly symmetrical.
A few times I had to cut away from the shape and re-tape the ear to get the shape I was after. Once this was achieved, I taped them onto the head to get the positioning correct, and then added more and more tape to set them in place. Once I was completely happy with the placing, I used 3 - 4 sticks of hot glue behind the ears to set them well. This also allowed me to shape and mould the ears as I went along. Once the glue set, they were surprisingly sturdy, as well as being adjustable. 
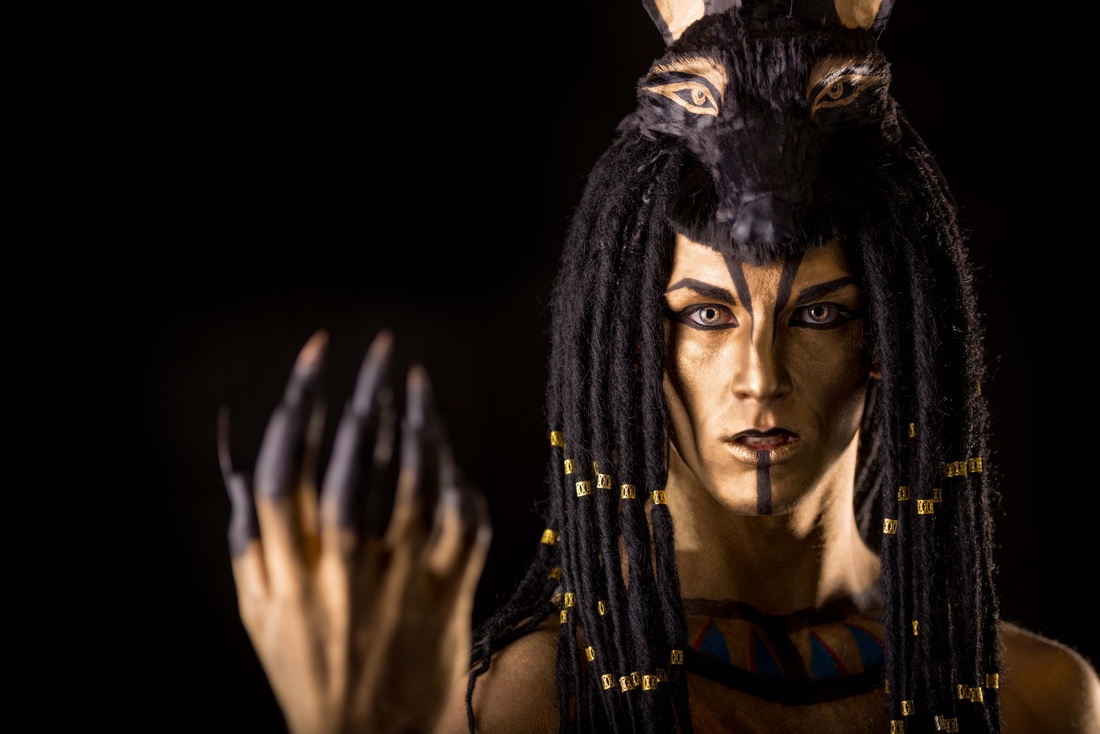
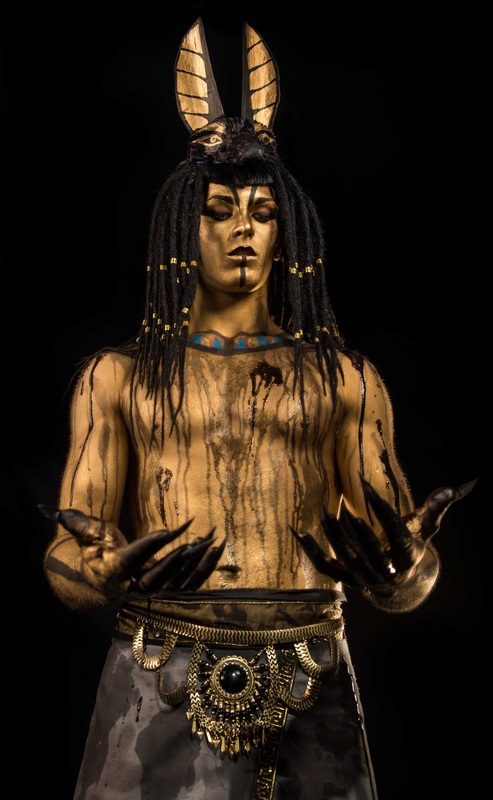
The fingernails were pretty straight forward. I
ordered them from a pro online nail
supply store - stiletto nail tips with a thicker nail edge and just glued them on top of the entire
nail. I painted the edges with a nude satin colour and blended in a black leading back down to the
finger. I made sure to paint the under edge of the nail black.
The black on the fingers during the photoshoot was Mehron black greasepaint and watered down black acrylic paint for the wet look, and for RAW I used Kryolan gel/supracolour. For both occasions I used double sided nail adhesive. 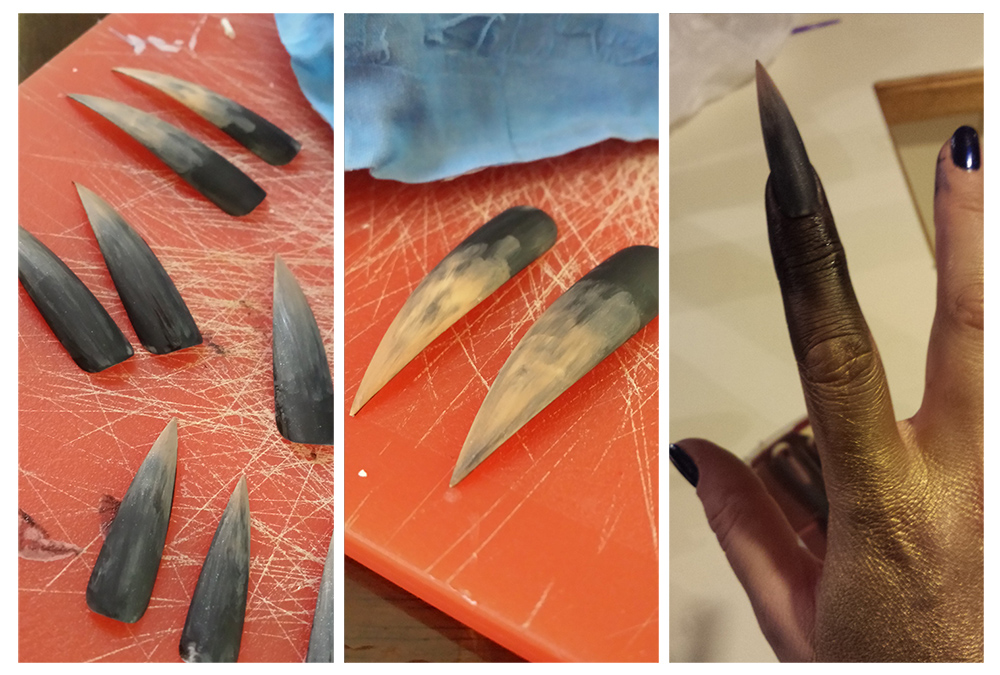
 Drybrushed with black acrylic paint Drybrushed with black acrylic paint
Costuming was pretty basic. I went
out to Spotlight and purchased a couple meters of black/gold trimmings I liked the look of, and settled
on cheap as chips poppin for the skirt. I also purchased teddy bear fur for the Jackal head.
The salesman at Spotlight was awesome - I was lucky to go on a day when he was there. He offered some valuable advice to a noob like me, such as washing the poppin a few times before organising the shape and cutting, and also using a cotton fabric coated in lacquer to create a wet look for the Jackal's snout which worked like a charm. He also suggested to drybrush an awesome black/gold trim I had picked, saying it would dull it out a little and make it look older - that worked really well too! The skirt was fabric glued together, as were the straps holding it on Luke. To age it, I shredded it with scissors, dragged it about the backyard under my shoes, washed it about 5 times, jumped on it, left it out in the sun and more... The belt was a simple wire edged gold ribbon, with the Lovisa necklace attached on the top. What no one knows is that after the photoshoot, the costume was so covered in paint and chocolate sauce and SFX blood, that I turfed it - thinking that Anubis was never going to return. So, yes, the RAW outfit was ENTIRELY new. I was lucky to find all of the exact same materials I had the first time, including the last ever necklace of it's kind in Lovisa! 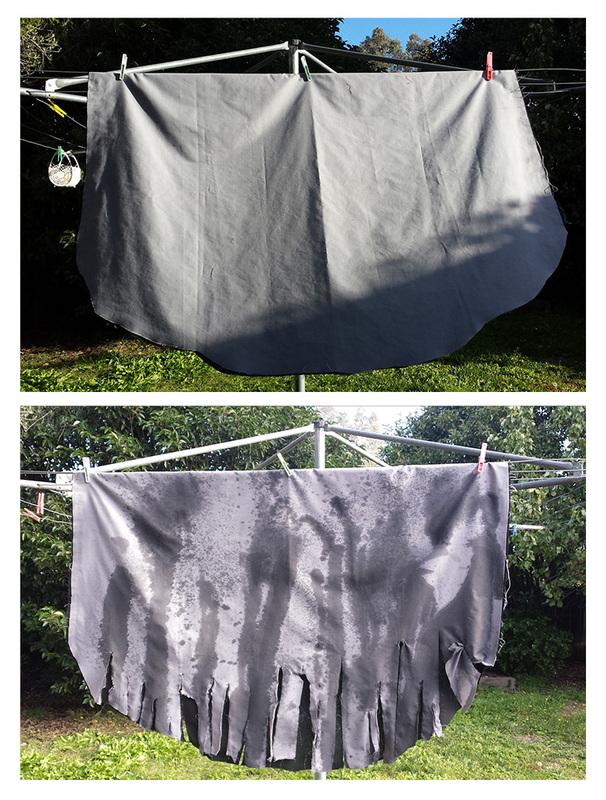
Before and after
The wig was a Mysdesign custom, and because it was
being used for a photoshoot I used a much lower quality wig than I normally would.
It was a $5 black bob party wig from the cheapo store at Marrickville Metro! I used some black recycled dreads from old kits in my collection and sewed them into the wig. I custom cut the fringe. The golden metallic wraps are from I Kick Shins online. Custom wigs such as this can be ordered on my website! 
The wig at the beginning of construction, and adding in the
dreads and metal clasps
Sewing the Jackal head to the wig was a
challenge. We eventually used an electric drill and a small drillbit to create holes in the Jackal
head which allowed me to hand sew it to the completed wig. I cut the rear of the head into thin
strips to allow it to fit the wig and the models head shape snugly.
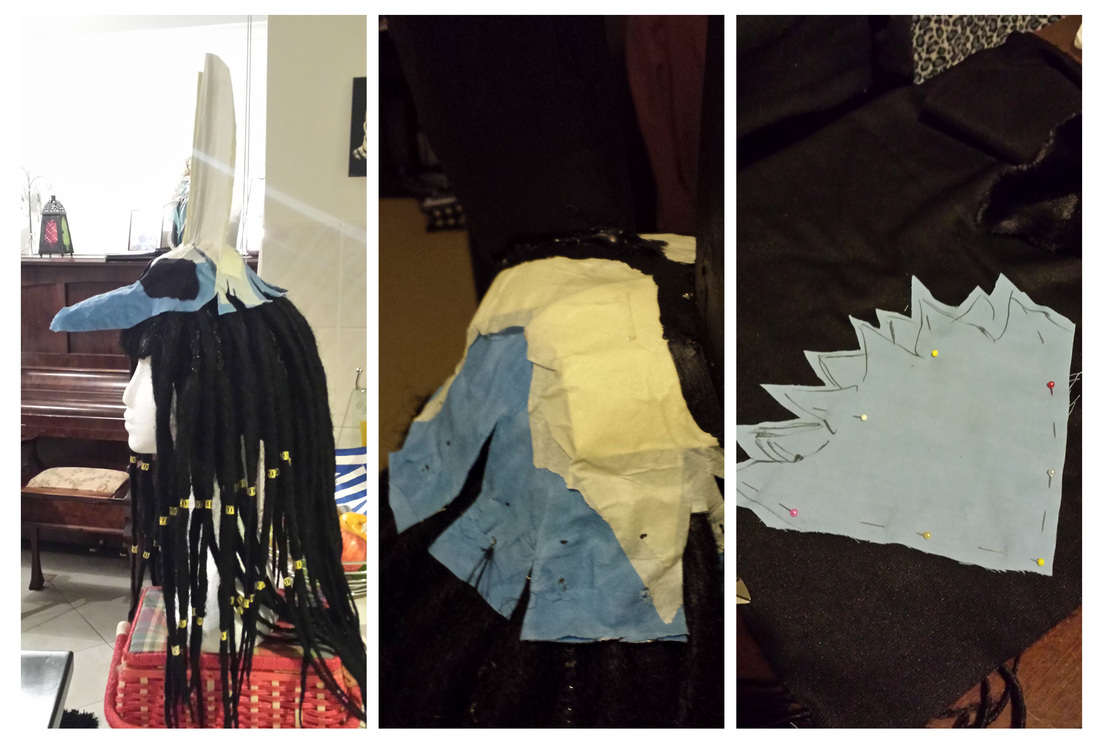
Fitting the Jackal to the wig, and creating patterns for the
teddy bear fur
Following this, I cut the teddy bear fur
from two patterns I created using a thin sheet. I made two parts that would fit in front and
behind the ears. I then hot glued these pieces on to the head. I was careful to ensure that
the head was completely covered, and the fur was following in the desired direction. I then
randomly brushed the fur with lacquer to create texture. I cut the fur at the back to look like it
was progressing down into the hair. Given more time here I might have included some loose human
hair to blend the teddy bear fur into the dreads.
The snout was created with a black cotton material and soaked with three coats of lacquer to achieve the wet leathery look of a dog snout. 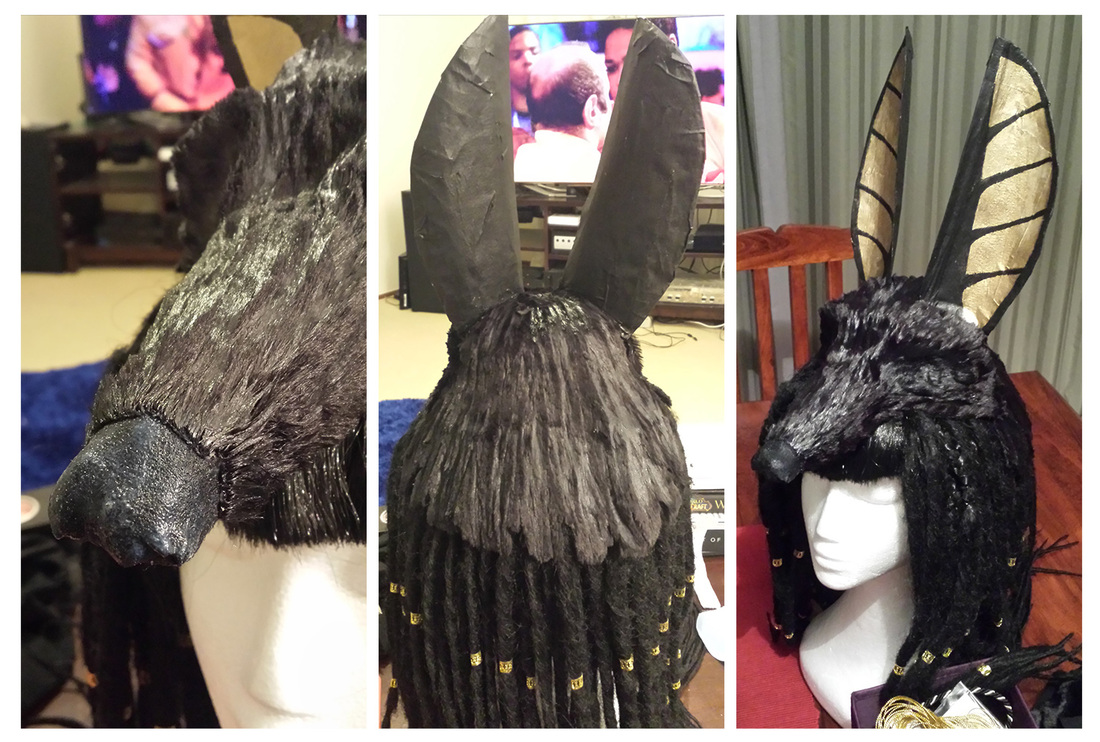
Attached teddy bear fur. Snout and fur texture. Graftobian
powder detail on the ears.
The ears were then painted with black
acrylic paint. All of the gold you see on the headpiece is Graftobian cosmetic powdered metal. What a
product this is. There's nothing it can't turn gold! I mixed it with Ben Nye liquiset and
painted the gold detail on the ears and on the eyes/eyebrows.
After a quick fringe trim and clean up, the wig was complete. 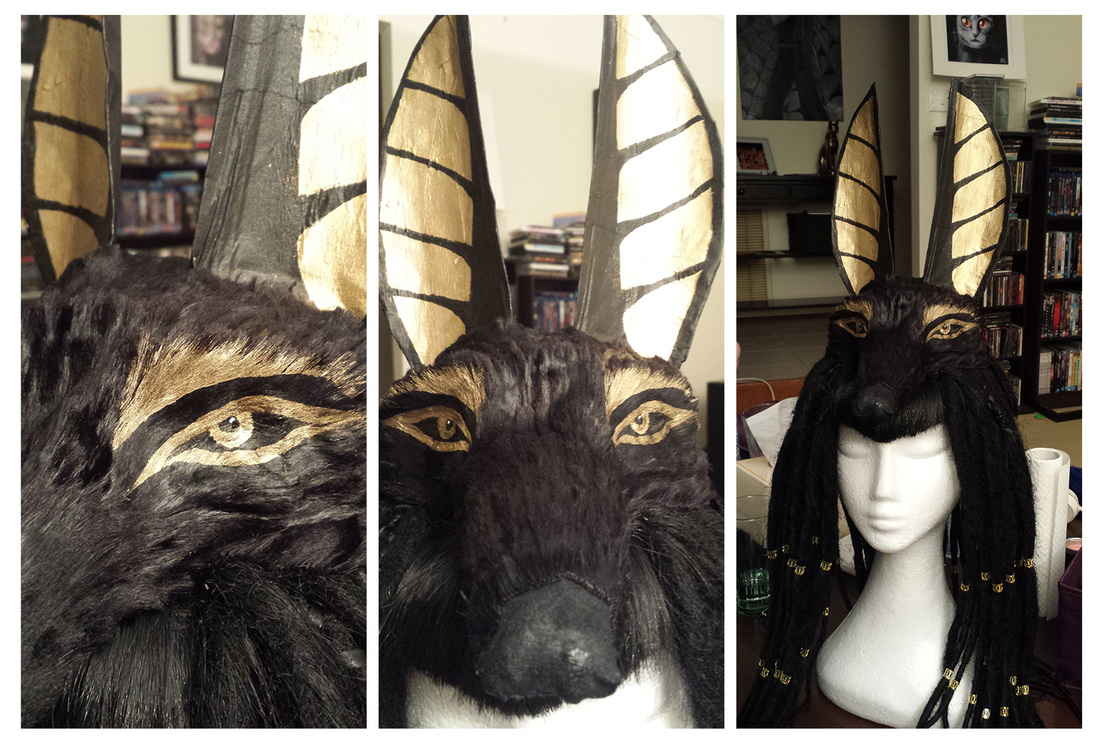
The eye detail painted on, and the finished wig.
Makeup design and trials were fairly brief for Anubis as I
knew that there couldn't be too much facial detail. I didn't want to make things too busy - but
also I didn't want them to be too sparse.
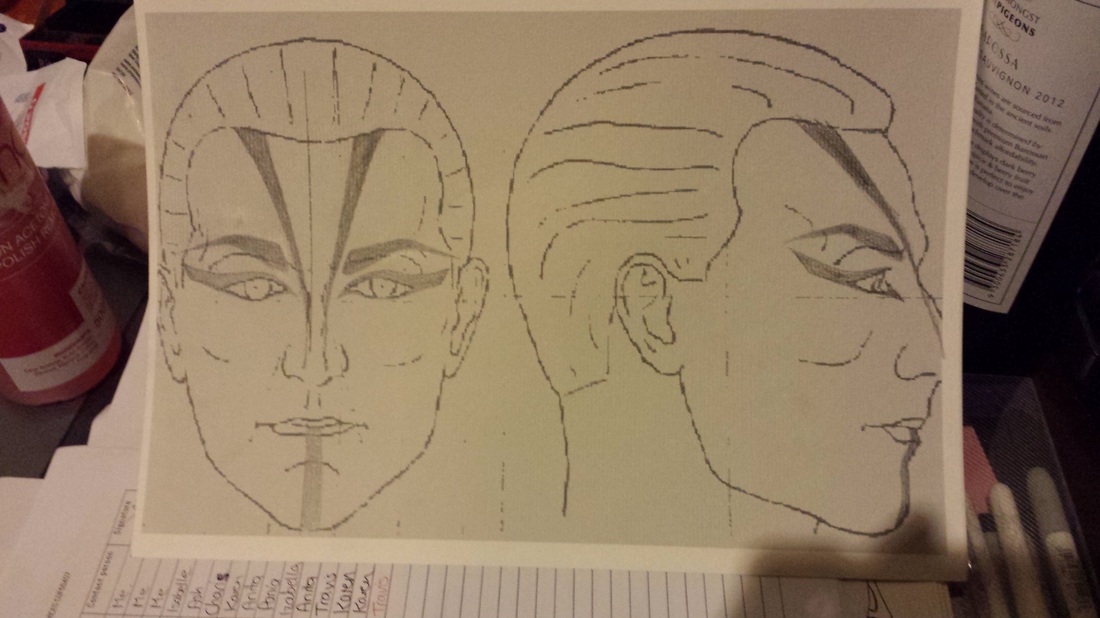
The original Anubis facechart.
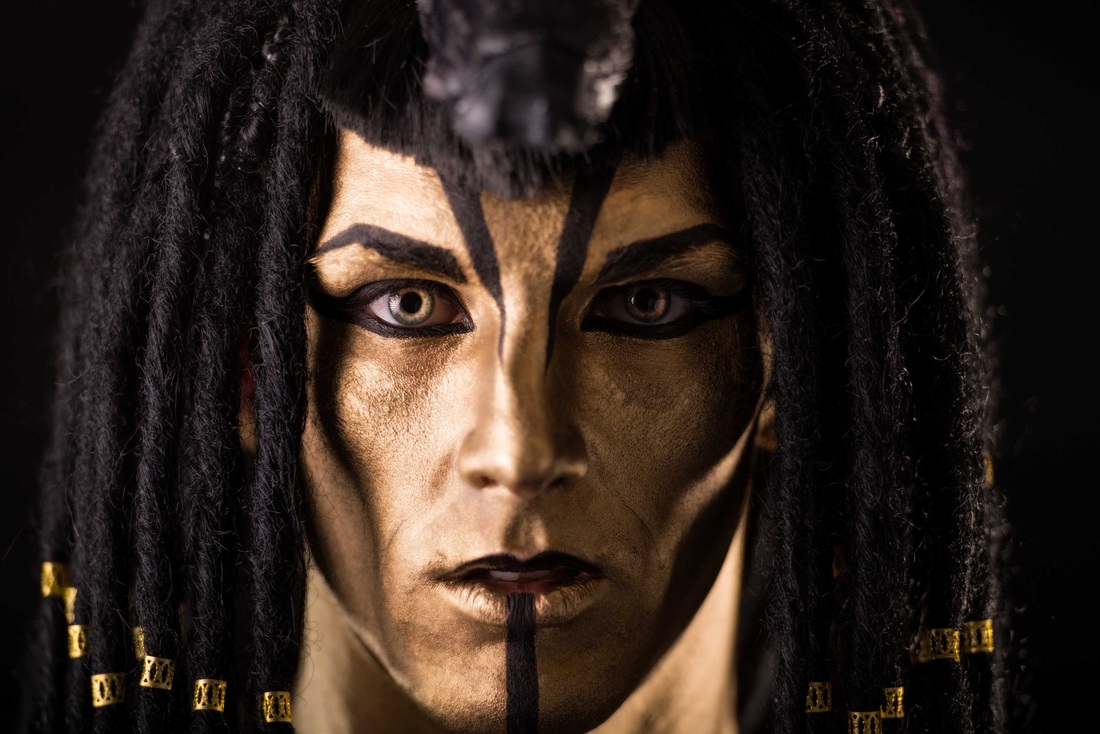
Trials were pretty basic. Testing how opaque the
powder was and which product was best to use on top. I ended up going with Kryolan supra for the
photoshoot, and gel for RAW. The blue and red on his neck detail are Ben Nye lumiere creme blushes.
The muscle contour was done with a dark brown Ben Nye eyeshadow. Contouring was on the face,
chest and abs, arms and back.

Trials with Graftobian powder and various black gels and
greasepaints.
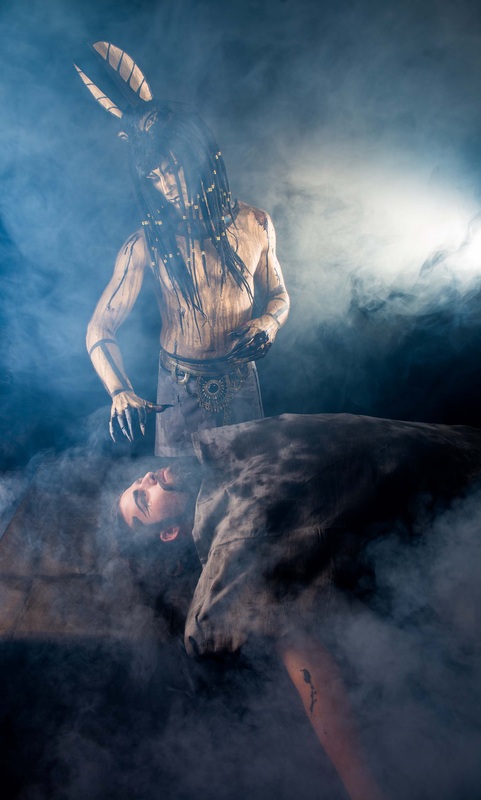
Finally the day had come, it took me 6 hours to bring
Anubis to life, during which time Luke
Middlebrook sat patiently, never falling asleep once... I swear.
Here's some BTS I snapped of Travis Longmore hard at work and my amazing fiance and assisstant on the
day Mike.
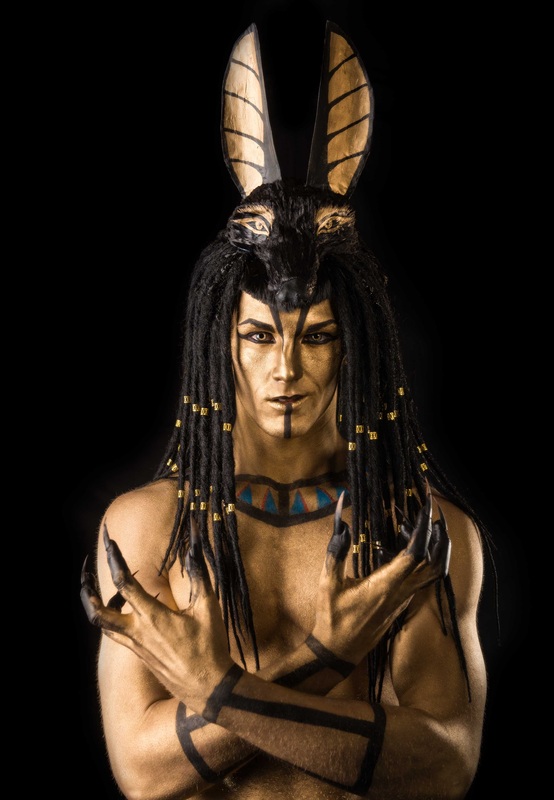
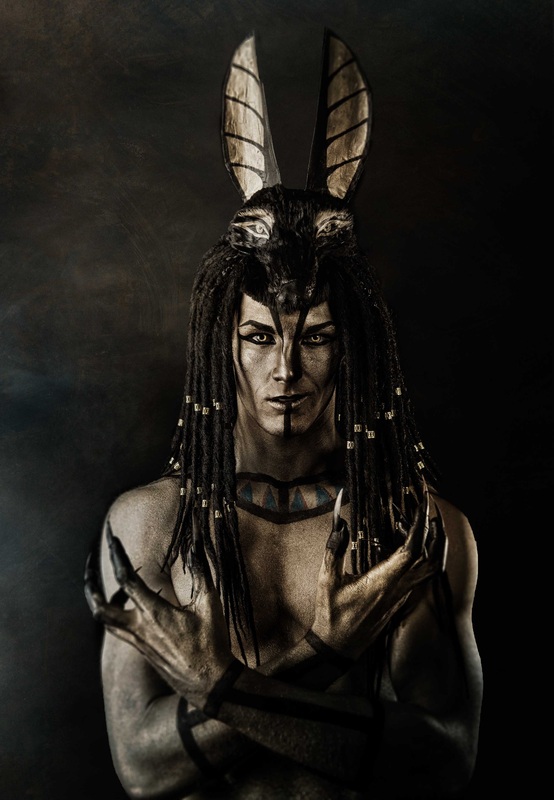
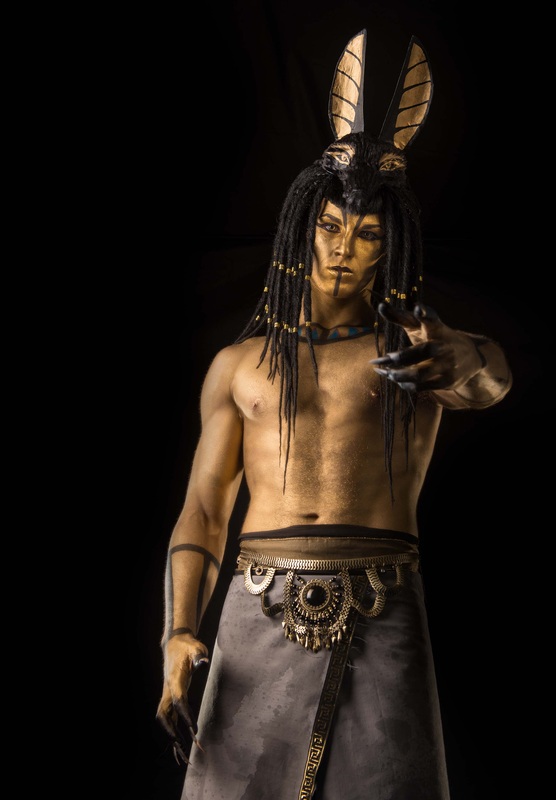
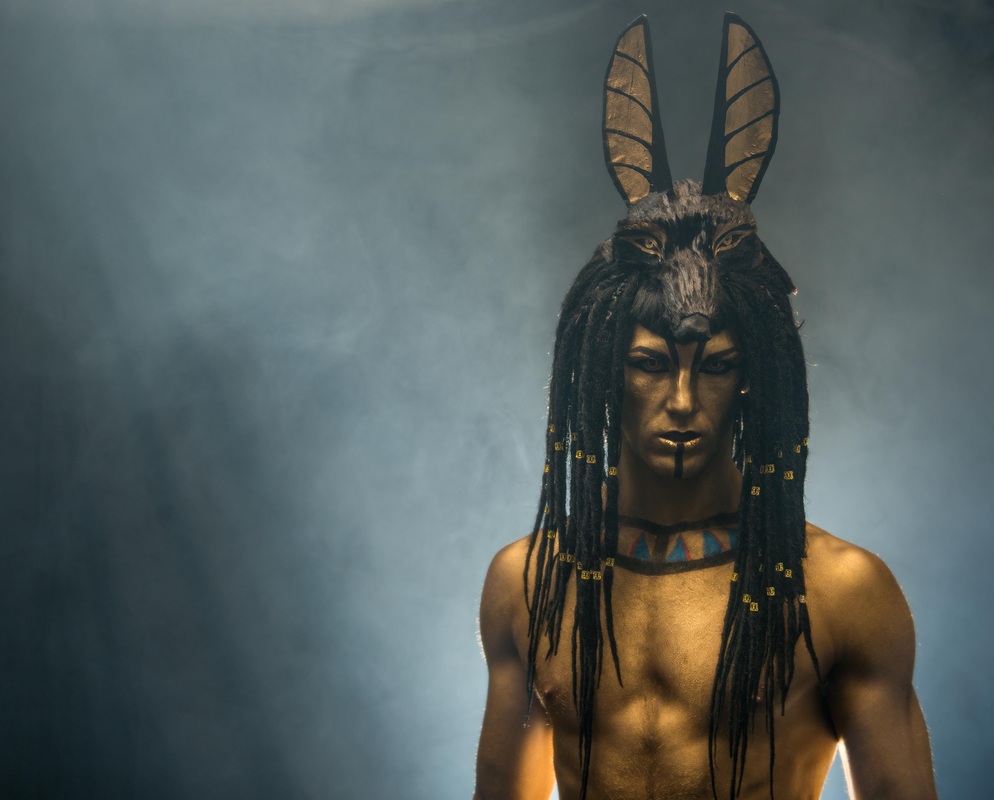
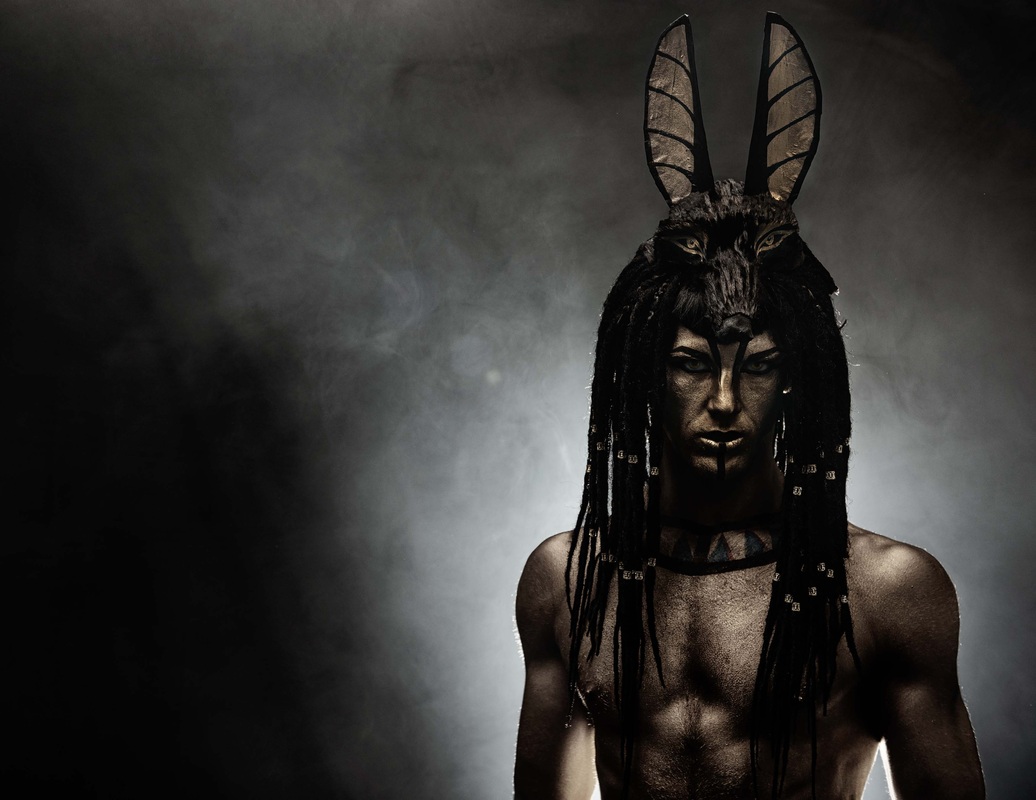
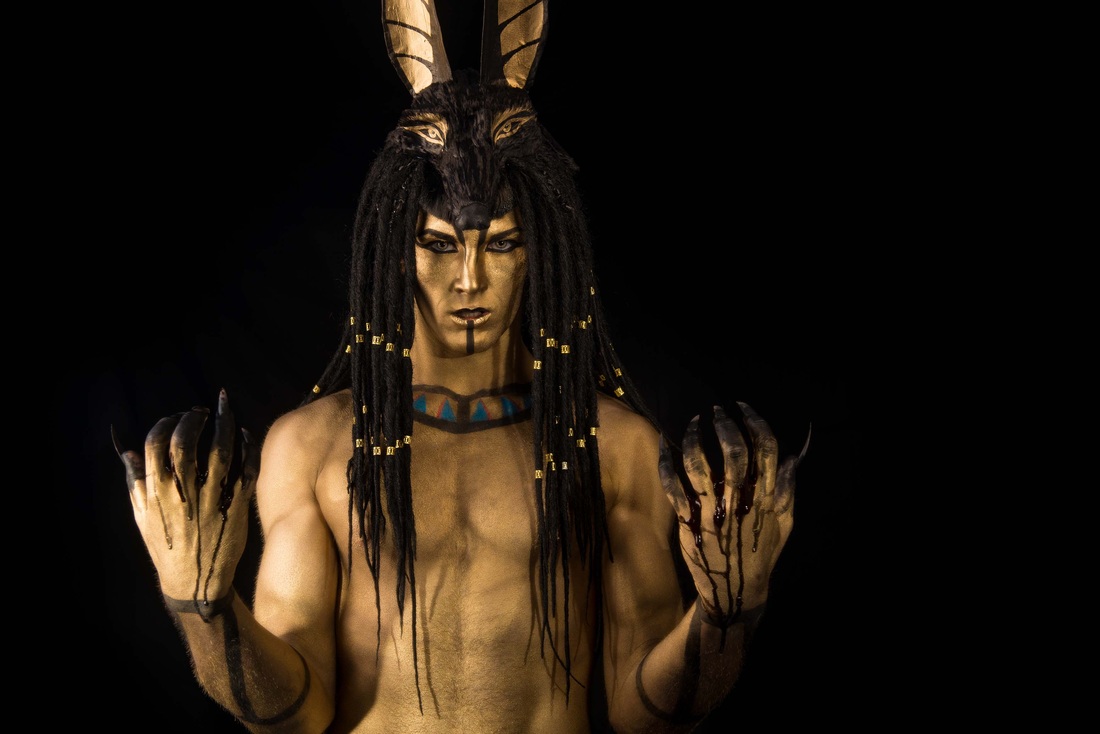
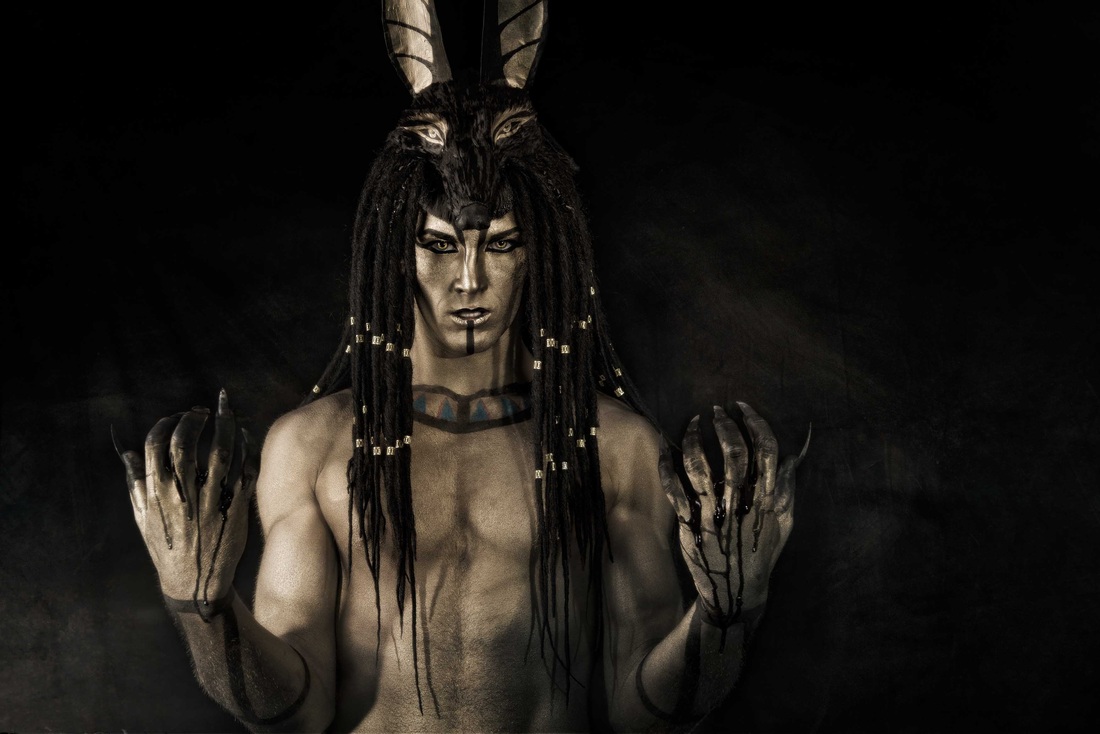
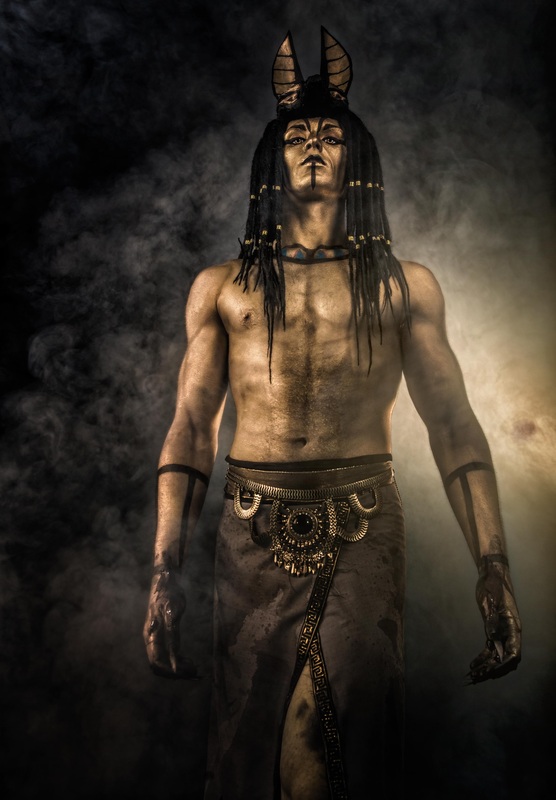
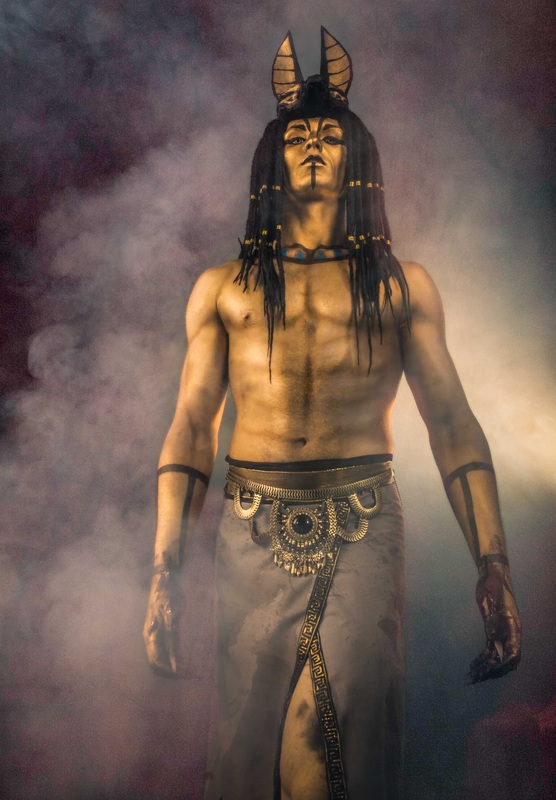
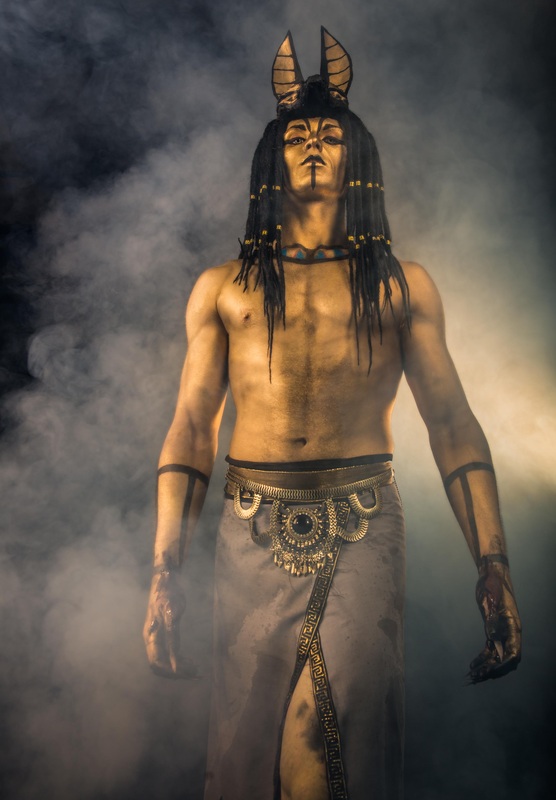
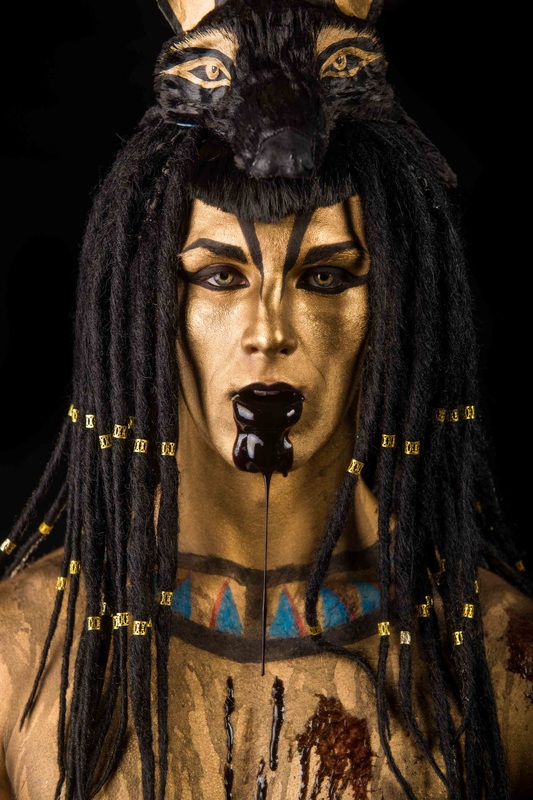
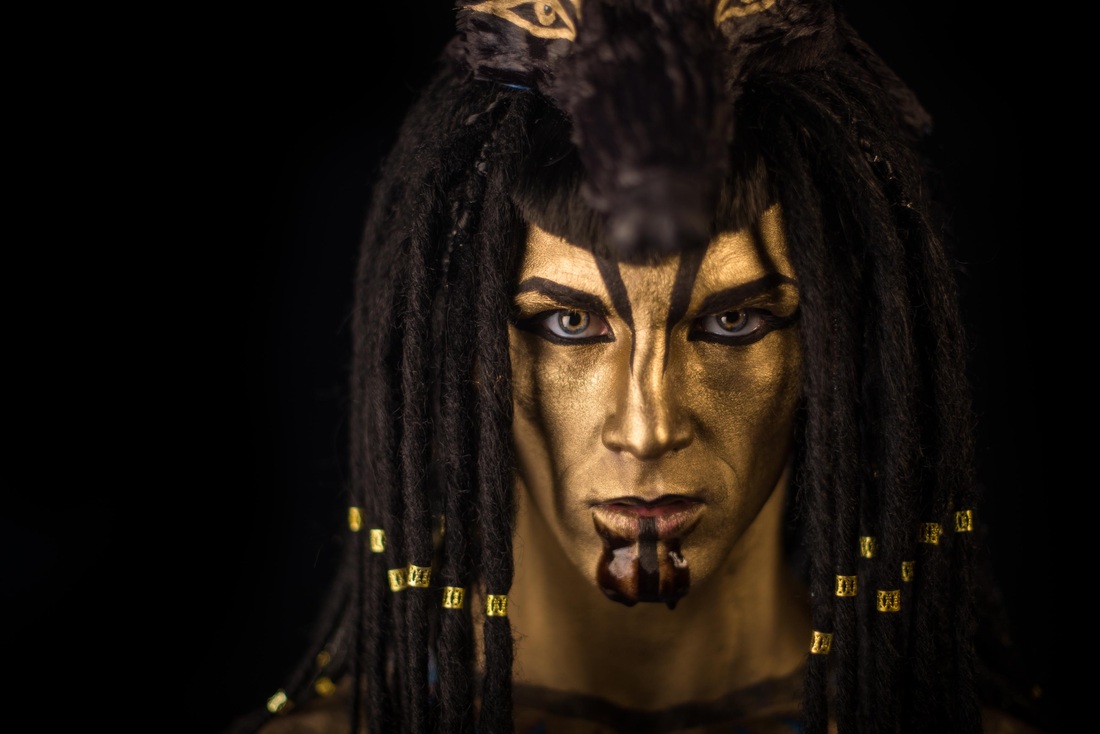
And here are some production shots from Travis.
And finally, the full set of images from the photoshoot.
If you've stayed around this long, thanks for reading - I hope this blog inspires and helps other
people to create their dream characters!
0 Comments
Your comment will be posted after it is approved.
Leave a Reply. |
Mys' MusingsMarie goes into detail about some of her more adventurous makeups, as well as other random things.. Archives
January 2015
Categories |


 RSS Feed